Getting Started
Install and configure a full-featured Subversion server on the Windows platform.
Overview
The process of getting started with VisualSVN Server includes the following main steps:
-
Installing VisualSVN Server
Download and launch the VisualSVN Server installer package to start the server deployment. -
Performing Initial Configuration
Perform the essential tasks using VisualSVN Server Manager MMC console to make the server ready for production use. -
Performing Advanced Configuration
Enable additional important features such as scheduled backup and verification, advanced logging, remote administration and multisite repository replication.
Installing VisualSVN Server
VisualSVN Server is distributed as a Windows Installer package (*.msi) file and comes with a setup wizard which will guide you through the basic steps to install the server. To begin the installation, you should download the VisualSVN Server installer package and launch it on the server computer.
Download the VisualSVN Server installer package from the main download page.
You will be presented with a setup wizard after launching the installer. The setup wizard will guide you through the following steps that are required to finish the installation.
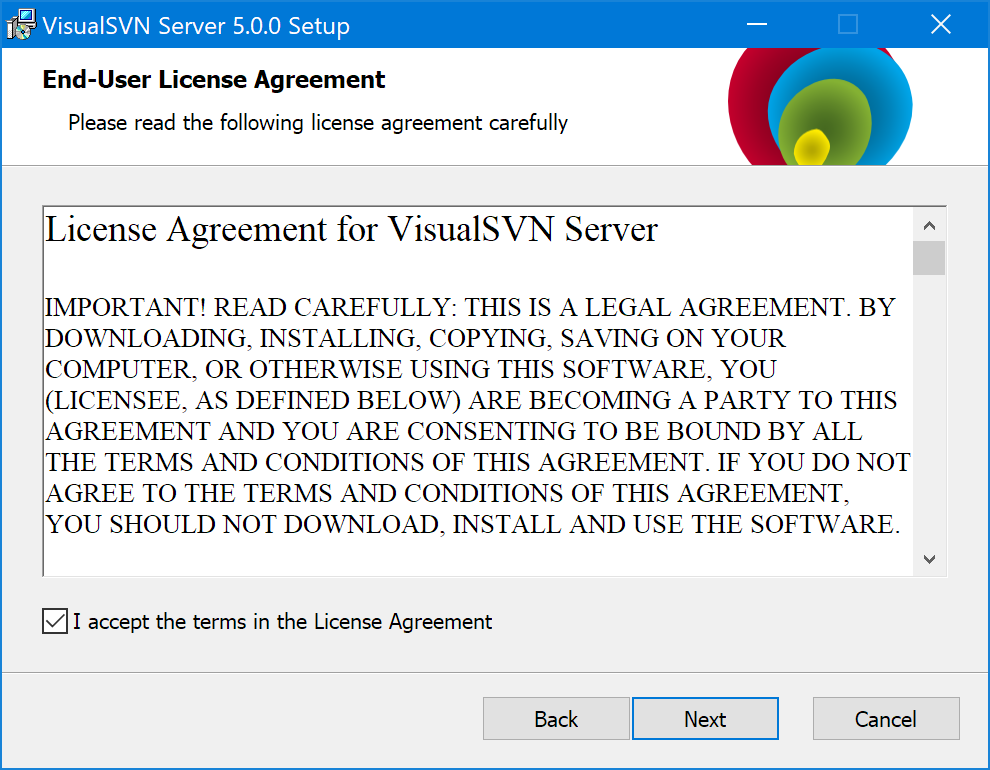
Accept the License Agreement
Review and accept the End User License Agreement (EULA).
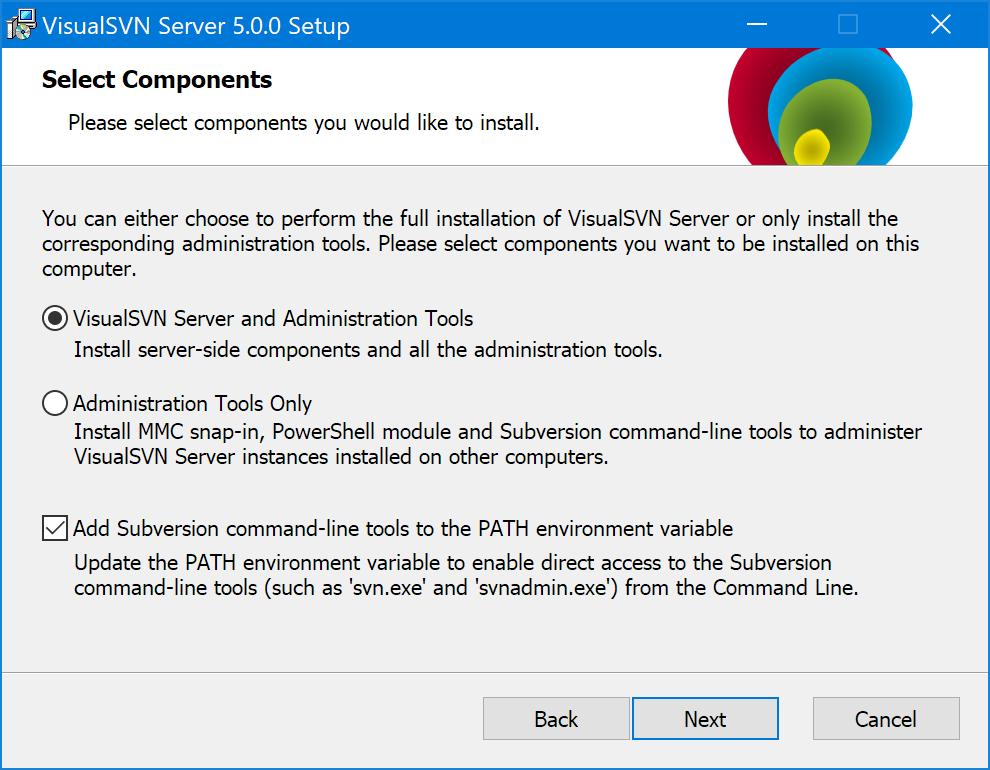
Select Components
Select to install VisualSVN Server and Administration Tools components when deploying VisualSVN Server.
Adjust initial server configuration
Optionally, adjust the default configuration settings before starting the installation.

- Location. Specifies the VisualSVN Server installation directory. The option can only be configured on the first install.
-
Repositories. Specifies the root directory where Subversion
repositories will be stored. For better performance it is recommended to
change the default location and store your repositories on a non-system
volume. However, you can keep the default repositories location during
the first install and change it later via the VisualSVN Server Manager
console.
TipRead the article KB190 for recommendations on choosing storage location for your repositories.
- Server Port. Specifies the TCP port that will be used by VisualSVN Server for client access to the repositories over HTTP(S). You can change the server port after installing the server.
- Use secure connection. Specifies whether to use secure HTTPS protocol for client access to the repositories. It is recommended to keep HTTPS protocol enabled. You can adjust this option after installing the server.
- Backups. Specifies the default destination location to be used for Subversion repository backups.
Configure search indexing for repositories
Consider enabling the full-text search feature that allows finding files with the specified content in the web interface. To enable the full-text search capabilities, you have to enable search indexing for repositories.
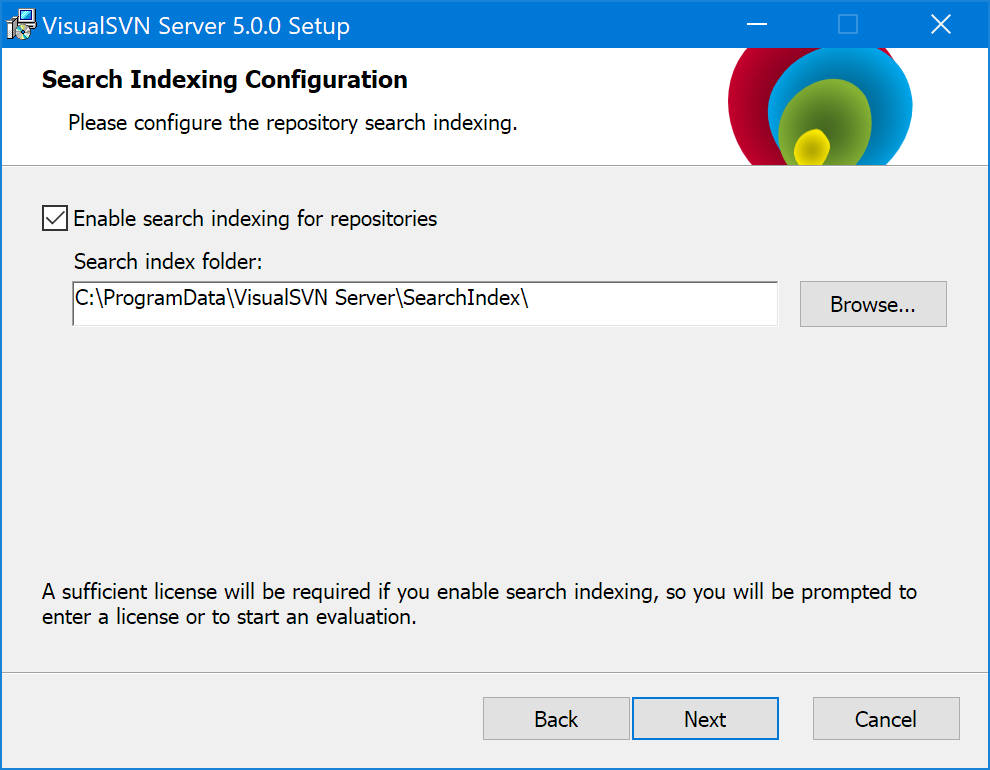
If you enable search indexing, it is generally recommended to change the default Search index folder location. See the search index folder requirements for additional details.
Note that the full-text search is not available under a free Community license, so the installer will generate an evaluation license or request you to provide a sufficient license key during one of the following steps.
Alternatively, you can keep the search indexing disabled during the first install and configure it later via the VisualSVN Server Manager console. See the KB178: Getting started with full-text search article for more information.
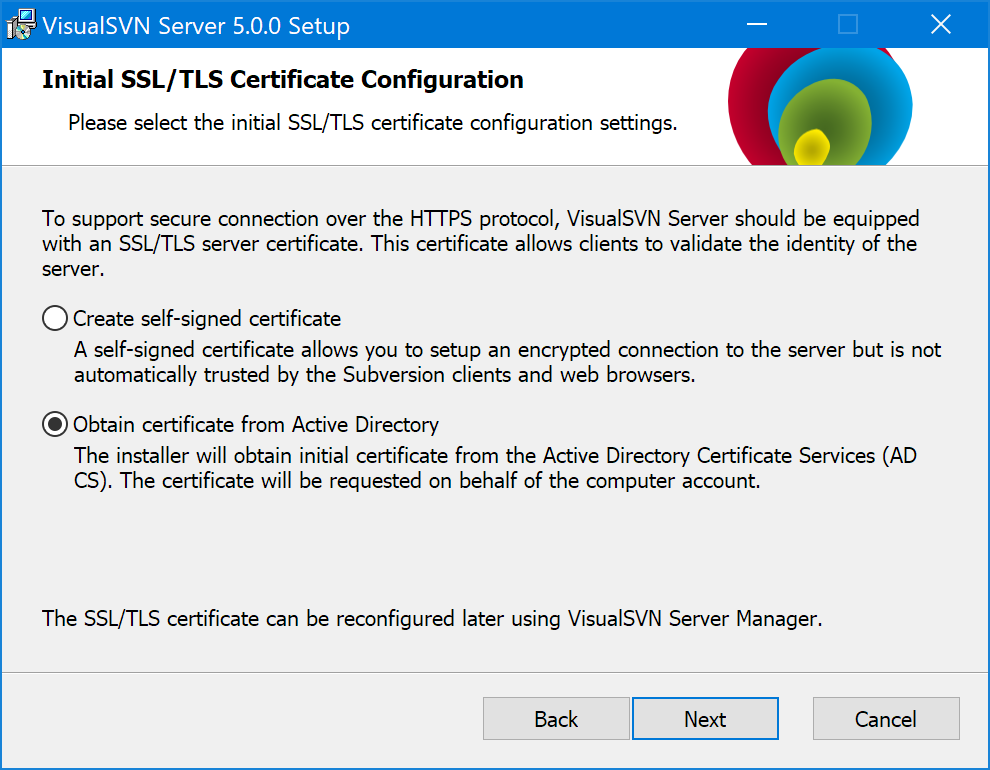
Configure the SSL/TLS certificate
If you kept the Use secure connection (https://) option enabled on the Initial Server Configuration page, VisualSVN Server will require an SSL/TLS certificate in order to work over the HTTPS protocol.
- If the computer is not joined to an Active Directory domain, the installer will automatically generate a self-signed certificate.
- If the computer is joined to an Active Directory domain, the installer will present two options: either to Create a self-signed certificate, or to Obtain the certificate from Active Directory. The second option is recommended, since it allows utilizing the existing Active Directory Certificate Services (AD CS) infrastructure to receive a certificate that will be trusted by the clients from the corresponding Active Directory domain or forest.
Note that in all cases, the initial SSL/TLS certificate can be reconfigured after the installation. If you chose to create a self-signed certificate, it is recommended to replace it with a certificate signed by a trusted certificate authority. Please see KB134: Configuring SSL Certificates for VisualSVN Server for additional details.
Select the option suitable to your environment and click Next.
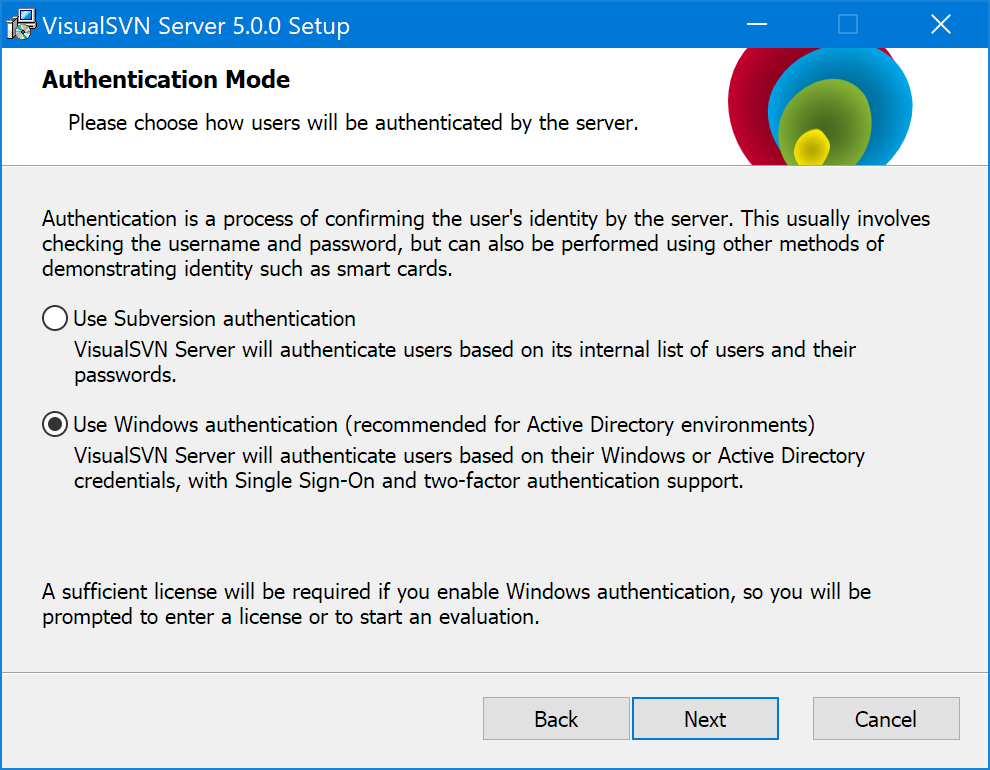
Select the authentication mode
VisualSVN Server allows selecting the authentication mode during the installation. Two authentication modes are available: Subversion authentication and Windows authentication (recommended for Active Directory environments). Read the article KB182: VisualSVN Server authentication modes for more information.
You can reconfigure the authentication mode later using the VisualSVN Server Manager console. Note that at the next step the installer will generate an evaluation license or request you to provide a sufficient license key if you choose Windows authentication because this feature is not available under a free Community license.
Select the required authentication mode and click Next.
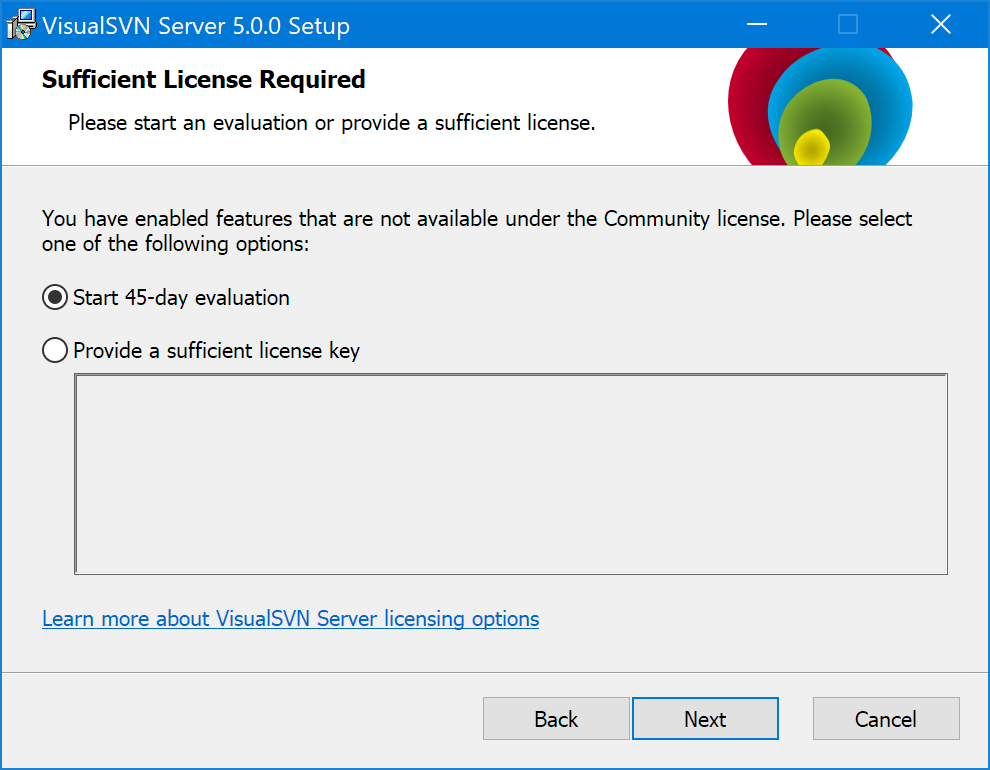
Start 45-days evaluation or enter sufficient license key
VisualSVN Server is available under the following main licenses types: Community (free), Essential (paid) and Enterprise (paid). The license type determines which features are available for the server. Read the article KB220: VisualSVN Server 5.2 Licensing Overview for the list of features and licensing details.
When you choose to enable repository search indexing or Windows authentication, you need to start a 45-day evaluation or enter a sufficient license key because these features are not available under a free Community license.
Select a suitable option, provide the license key if needed and click Next.
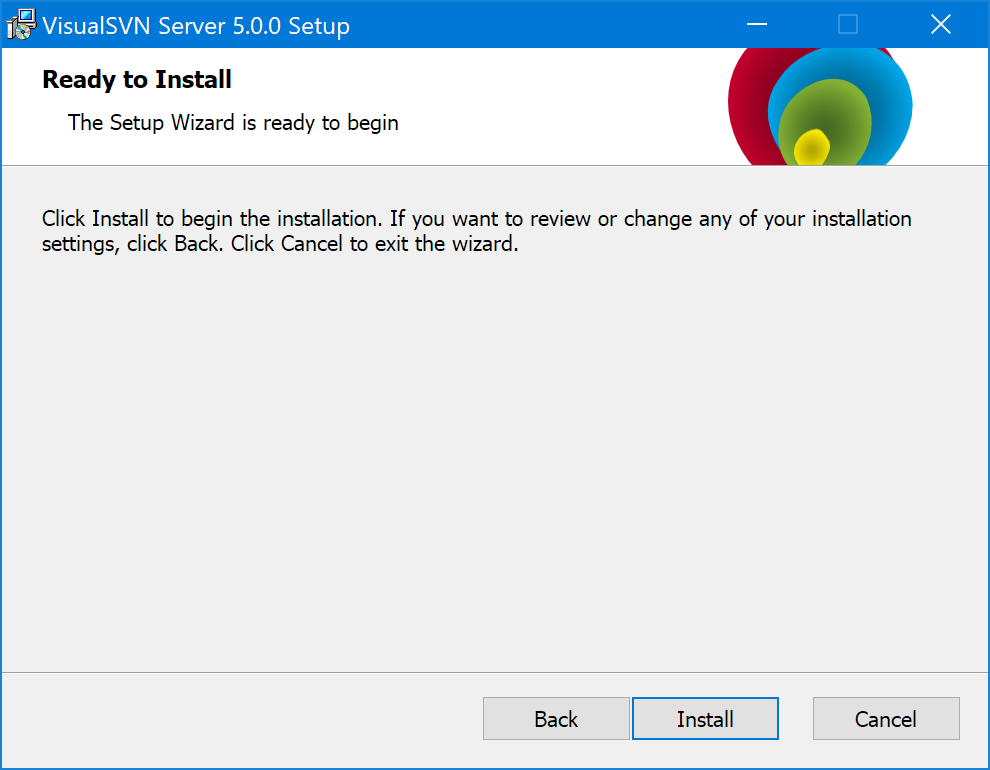
Finish the installation
On the last screen of the setup wizard, make sure that the Start VisualSVN Server Manager option is selected. Click Finish to close the installer and proceed to the server configuration steps with VisualSVN Server Manager console.
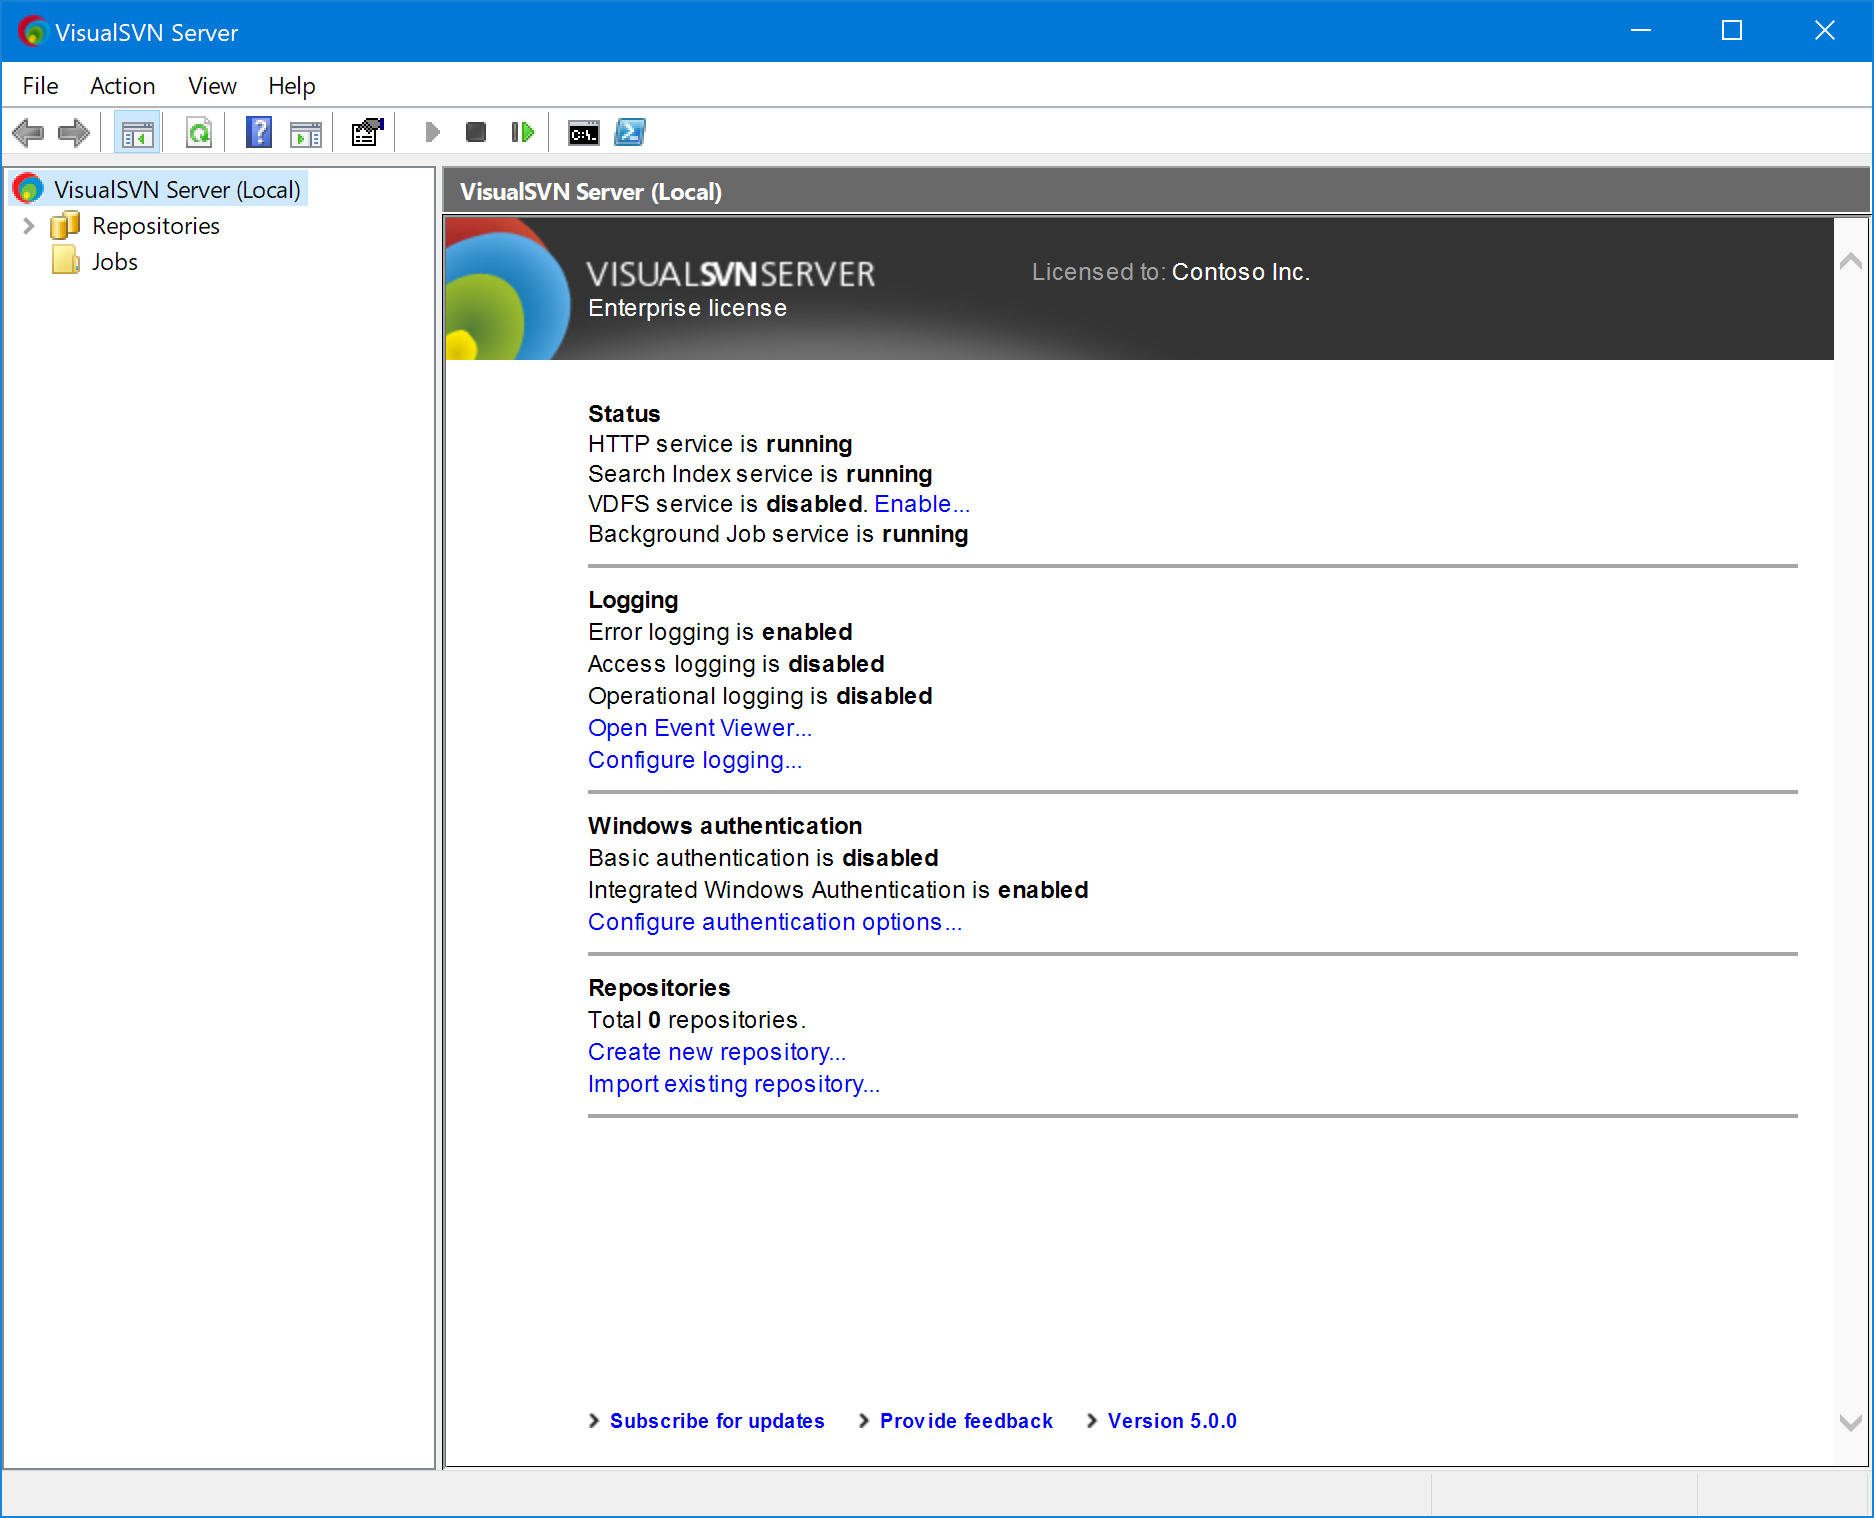
VisualSVN Server Manager will launch as soon as the installation is complete. VisualSVN Server Manager is the main tool to control the server. The console provides an intuitive graphical interface for server and repository administration.
Performing Initial Configuration
After finishing the VisualSVN Server installation, you need to perform initial server configuration and tailor the new server deployment to your environment before the server goes live. The initial configuration process consists of the following steps:
- Configuring Network Settings
- Configuring Authentication Settings
- Configuring SSL Certificate
- Adding Repositories
- Configuring User Permissions
- Final Check-Up
Configuring Network Settings
VisualSVN Server provides several configurable network settings that you should review after the installation and adjust if required.
Follow these steps to open up the network settings:
- Start the VisualSVN Server Manager console.
- Click Action | Properties.
- Click the Network tab.
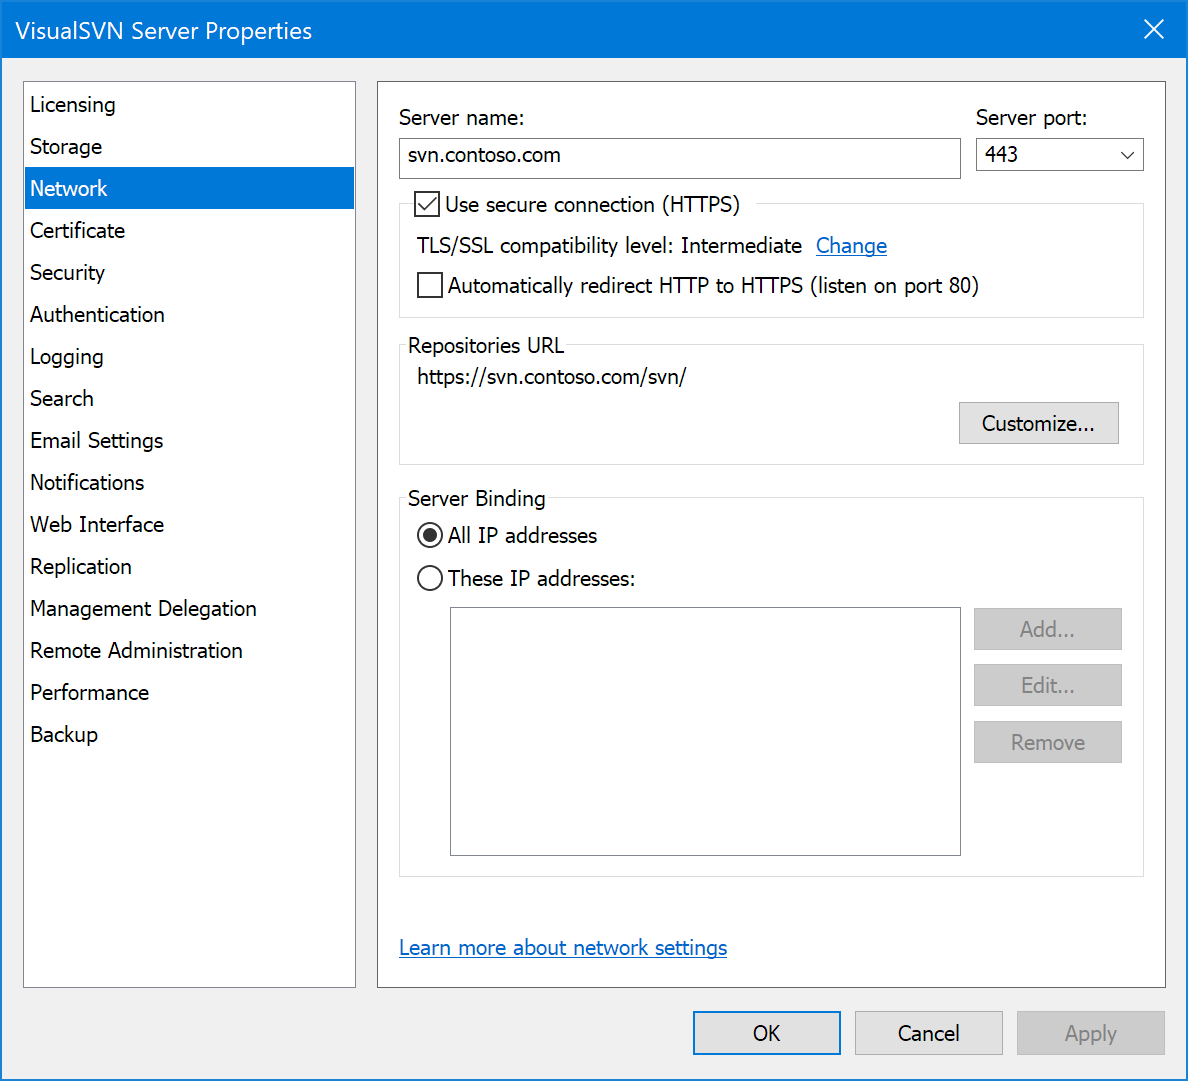
- Server name. By default, VisualSVN Server takes the local server hostname as the server name. If you plan to access VisualSVN Server and the repositories using another DNS name, you should manually adjust the setting to include this DNS name.
- Automatically redirect HTTP to HTTPS (listen on port 80). VisualSVN Server can help you transparently switch from plain HTTP to secure HTTPS protocol without any disruption for users. Consider enabling this setting if you plan to switch access to the repositories from HTTP to HTTPS.
- Repositories URL. All the repositories hosted on VisualSVN Server are nested under single repository root in the URL. By default, the root URL prefix is svn/. You can adjust the root URL prefix if required.
- Server Binding. VisualSVN Server binds to all available IP interfaces, by default. You can bind VisualSVN Server to specific network interface if required.
Read the article KB191: Understanding VisualSVN Server network settings for more information.
Configuring User Authentication Settings
It is recommended to review user authentication settings before starting to add the Subversion repositories to a newly installed VisualSVN Server instance.
Follow these steps to open up the authentication settings:
- Start the VisualSVN Server Manager console.
- Click Action | Properties.
- Click the Authentication tab.
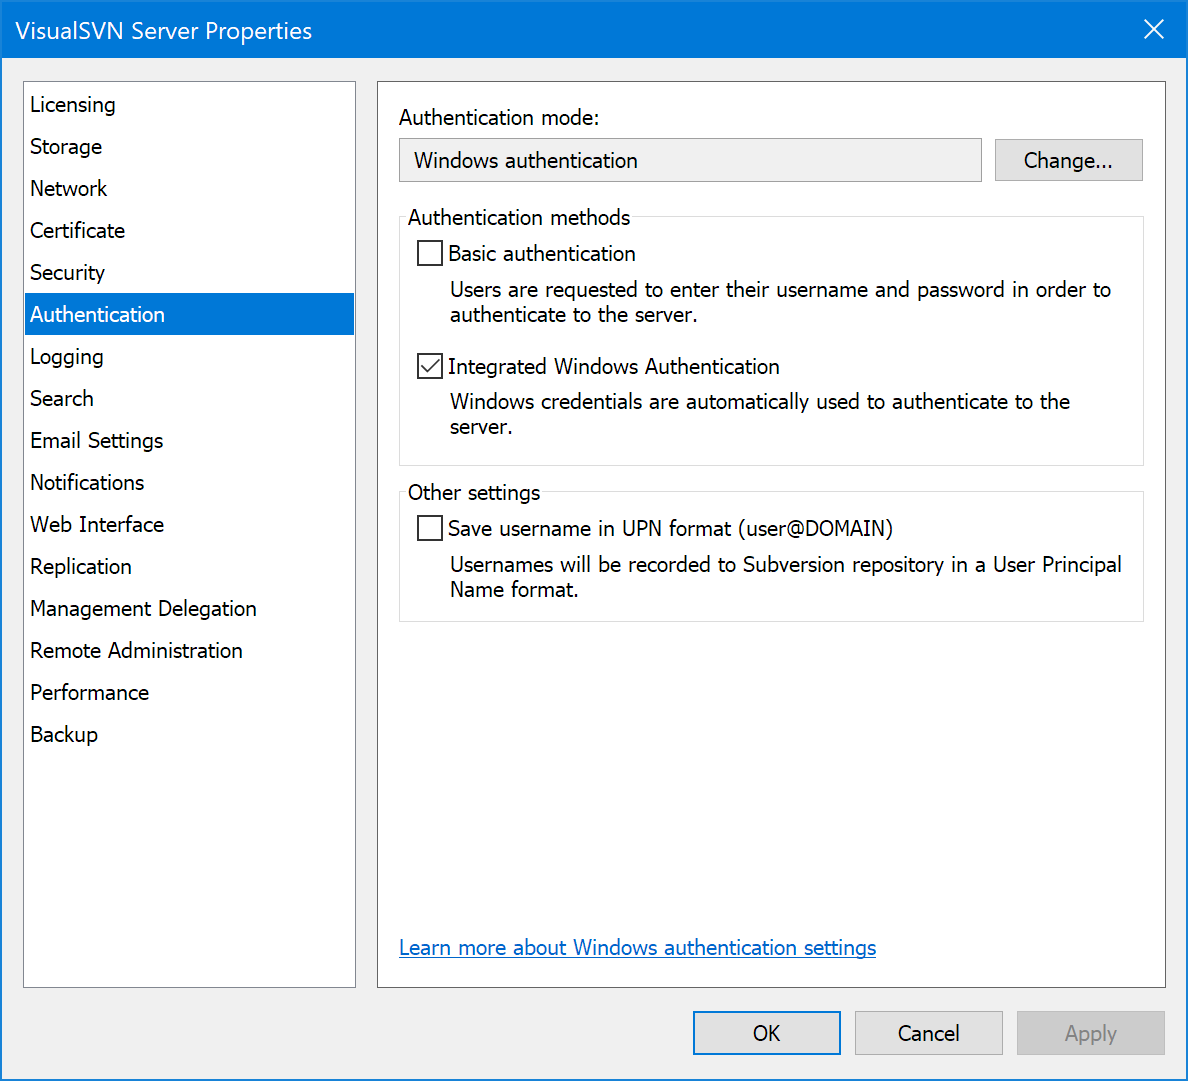
VisualSVN Server supports two distinct authentication modes:
- Subversion authentication is suitable for non-domain VisualSVN Server installations with a few number of users. It relies on the internal user list maintained by VisualSVN Server and supports Basic Authentication only.
- Windows authentication is suitable for VisualSVN Server installations in Active Directory. It relies on Active Directory user credentials and supports Basic Authentication and Integrated Windows Authentication (Active Directory Single Sign-On).
Read the article KB182: VisualSVN Server authentication modes for more information.
Configuring SSL Certificate
In order to provide end-users with access to repositories using the secure HTTPS protocol, VisualSVN Server must be equipped with a valid SSL certificate.
If you didn't change the defaults during the installation, your server should be already working over the HTTPS protocol, with a preconfigured SSL certificate for the hostname of the server computer where VisualSVN Server is installed. Depending on your environment and options selected during the installation, it will be either a self-signed certificate or a certificate obtained from the Active Directory Certificate Services (AD CS).
If the certificate was obtained from the Active Directory and you didn't change the Server name on the Network tab, the certificate is already valid and trusted by the clients from the corresponding Active Directory domain or forest. So, no additional actions are required.
In all other cases, please refer to the KB134: Configuring SSL Certificates for VisualSVN Server article.
Adding Repositories
Freshly installed VisualSVN Server instance does not include any default repositories. You must create new or import existing Subversion repositories into VisualSVN Server. VisualSVN Server Manager console helps you add the repositories in a straightforward wizard-driven mode.
Importing Existing Repositories
To import an existing repository, run Import Existing Repository wizard in VisualSVN Server Manager:
- Start the VisualSVN Server Manager console.
- Right-click the Repositories node.
- Click Import Existing Repository.
- Follow the steps of the wizard to complete the task.
For more information, read the article KB10: Importing Repositories into VisualSVN Server.
When importing a repository with Subversion hook scripts, you should carefully test and review the hooks to ensure that they work on the new computer as expected.
Creating New Repositories
To create a new repository, run Create New Repository wizard in VisualSVN Server Manager:
- Start the VisualSVN Server Manager console.
- Right-click the Repositories node.
- Click Create New Repository.
- Follow the steps of the wizard to complete the task.
Configuring User Permissions
VisualSVN Server lets you specify the initial user access permissions when you create new or import existing Subversion repositories. Before the server goes live, it is recommended to review the user permissions and adjust them if needed.
The server administrators and repository supervisors must understand the access control principles in Subversion. Read the article KB33: Understanding VisualSVN Server authorization for more information.
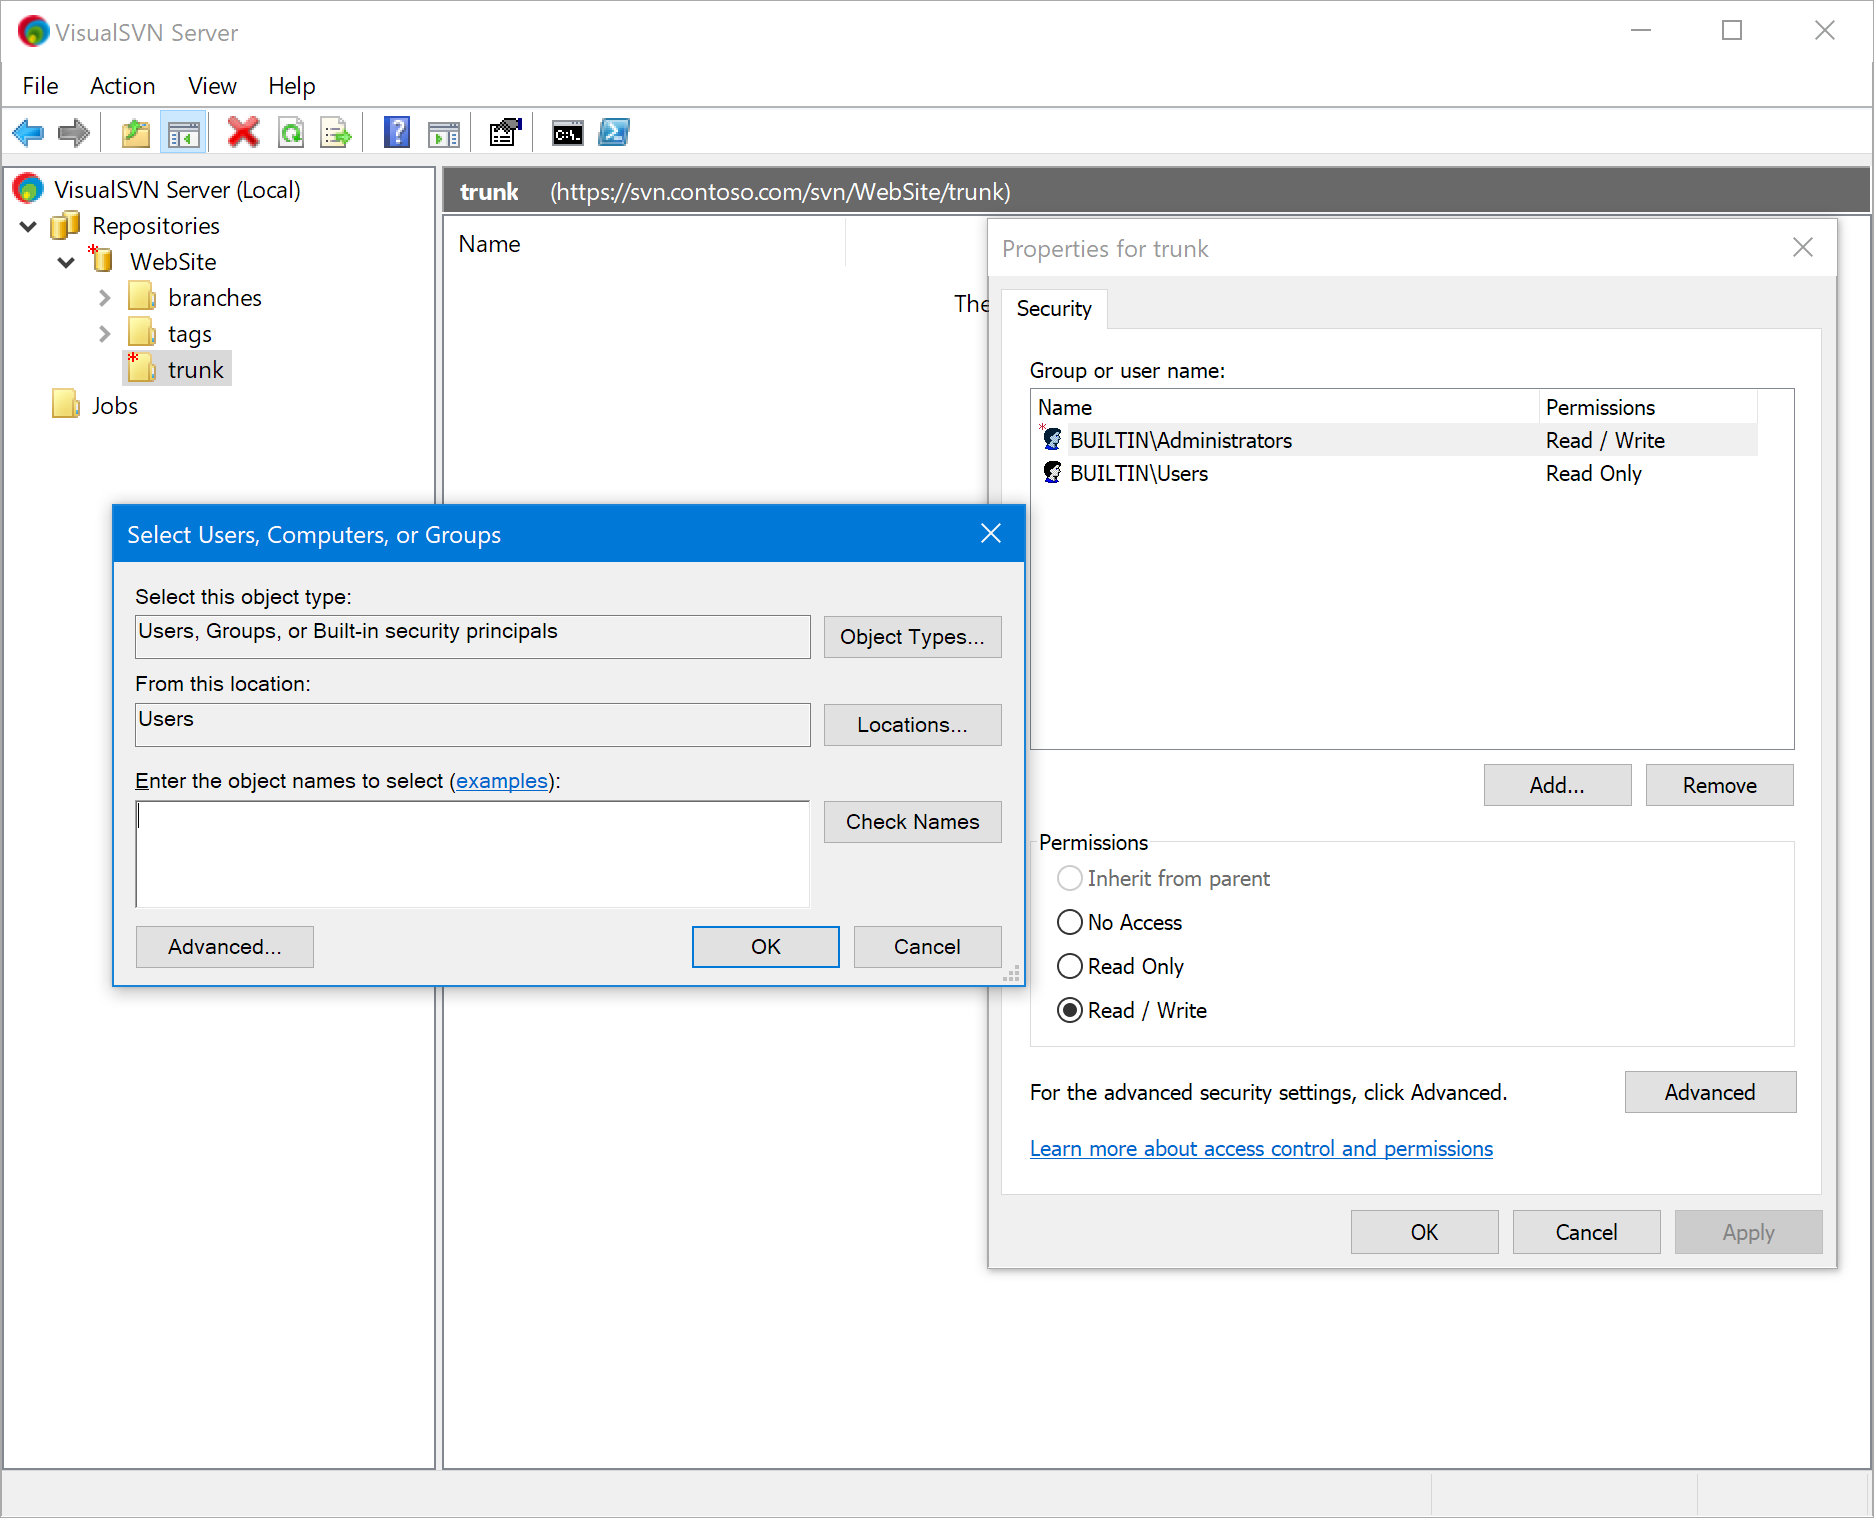
VisualSVN Server fully supports path-based authorization with Read / Write, Read Only and No Access access levels. You can manage user permissions on any level including per-folder and per-file levels.
VisualSVN Server Manager console provides an intuitive graphical interface for access control.
Follow these steps to manage user permissions in your repositories:
- Start the VisualSVN Server Manager console.
- Within the Repositories tree displayed in the left-hand pane, pick a folder or file for which you want to view/adjust access rules. You can pick any item in the Repositories tree, including the top Repositories node itself.
- Right-click this desired item and select Properties | Security tab.
- Make any desired changes to the access rules:
- To create an access rule for a user or a user group, click Add below the Group or user name list.
- To modify the access level for a user/group, select the user/group in the list and specify the desired access level in the Permissions section below the list.
- To remove an access rule, select it in the list and click Remove.
- Click Apply for the changes to take effect.
The steps described above allow you to define and manage user access permissions without having to deal with command line tools and text-based configuration files. What is more, VisualSVN Server allows you to automate access permission management and perform it in bulk with the help of VisualSVN Server PowerShell.
Configuring antivirus exclusions
During the installation, VisualSVN Server automatically adds necessary antivirus exclusions to the built-in Windows Defender antivirus. However, if you use other antivirus software, it is strongly recommended to add exclusions manually. Read the KB171: Configuring antivirus exclusions for VisualSVN Server article for more information.
Final Check-Up
At this point, the initial VisualSVN Server configuration should be complete. It is time to perform a quick test drive to ensure that the repositories are online.
VisualSVN Server makes Subversion repositories available to users through the HTTP(S) protocol. To access the data in your repositories, you can use a web browser or Subversion client including command-line svn.exe and GUI clients.
When on the quick test drive, you should be logged to Windows under the account that has appropriate access permissions to VisualSVN Server. If you have configured VisualSVN Server to use Integrated Windows Authentication, you should be not prompted for your username and passwords. You should not be warned about non-trusted SSL certificate, too.
Subversion Client Test Drive
Subversion client is the main tool to access and operate with the versioned data in your Subversion repositories. As part of the final check-up, you should checkout a working copy using Subversion client.
To access the repository, you should first obtain its URL. You can always find the correct repository URL using VisualSVN Server Manager console:
- Start the VisualSVN Server Manager console.
- Expand the Repositories node.
- Right-click a repository or repository path and click Copy URL to Clipboard.
You can paste the URL using the Ctrl+V keyboard shortcut into the URL field of your Subversion client. If you use the command line svn.exe client, you should run svn checkout command to create the working copy of your versioned project. Here is an example:
Repository Web Interface Test Drive
VisualSVN Server comes with a rich web interface for Subversion repositories. The web interface is automatically enabled for each repository hosted on VisualSVN Server.
As part of the final check-up, start your web browser and open the Repository Web Interface. To access the repository, you should first obtain its URL. You can always find the correct repository URL using VisualSVN Server Manager console:
- Start the VisualSVN Server Manager console.
- Expand the Repositories node.
- Right-click a repository or repository path and click Copy URL to Clipboard.
As soon as you copy the URL, you can paste it using the Ctrl+V keyboard shortcut into the address bar of the web browser and navigate to the repository.
Performing Advanced Configuration
VisualSVN Server offers additional unique features that are suitable for server installations of any size. These features are must-have for VisualSVN Server installations in corporate environments.
Schedule Repository Verification
VisualSVN Server comes with built-in scheduled verification of the Subversion repositories. The verification jobs check the integrity of your repositories. Verifying your repositories on a regular basis is important for early detection of repository corruptions caused by disk failures. Read the article KB115: Getting started with repository verification jobs for setup instructions.
Schedule Repository Backup
VisualSVN Server comes with the built-in Backup and Restore solution for the Subversion repositories. The feature helps you make daily backups of the repositories of any size and does not have any impact on performance and user operations. What is more, the Backup and Restore feature in VisualSVN Server is very easy to setup and maintain.
When deploying VisualSVN Server, we suggest that you add a scheduled backup job to ensure that your repositories are properly backed up. Read the article KB106: Getting started with Backup and Restore for setup instructions.
Enable Full-Text Search
VisualSVN Server provides an almost zero-configuration full-text search solution for your repositories. With this feature, all revisions in the repositories can be indexed and searched through the web interface. Users can search for content, filename and log message matches in any folder they have access to, and the results are filtered according to the authorization settings.
To start using Full-Text Search, you need to enable search indexing in the server properties. Read the article KB178: Getting started with full-text search for setup instructions.
Enable commit email notifications
A commit email notification is an email that is sent in response to a new commit in the repository. VisualSVN Server can be configured to automatically send such email notifications for new commits in all or selected repositories. This can be achieved by using the Subversion hook handler included in the server's installation package. Read the article KB18: Configuring Email Notifications in VisualSVN Server for setup instructions.
Enable Access and Operational Logging
VisualSVN Server Essential and Enterprise licenses come with the Access and Operational Logging feature. Access and Operational Logging allows you to monitor all HTTP requests and all logical Subversion operations processed by VisualSVN Server, including read-only operations such as Checkout and Update. You can use Windows Event Viewer to view the logs because the log entries are recorded to the standard Windows Event Log.
Follow these steps to enable Access and Operational Logging:
- Start the VisualSVN Server Manager console.
- Click Action | Properties.
- Click the Logging tab.
- Select Access logging and Operational logging.
- Click Apply.
By default, the maximum size of the Windows Event Logs is 20480 KB which may be less than optimal for larger VisualSVN Server installations. It is recommended to review and increase the maximum log size depending on your VisualSVN Server's load. You can also adjust the retention policy for the event logs. Follow the instructions from the articles below:
Enable Repository Management Delegation
VisualSVN Server Enterprise license comes with the Repository Management Delegation feature. The feature helps you delegate user permission management duties by assigning repository supervisors - non-administrative users who can manage user permissions with VisualSVN Repository Configurator tool. Read the article KB62: Getting started with Repository Management Delegation for setup instructions.
Enable Multisite Repository Replication
VisualSVN Server Enterprise license comes with the Multisite Repository Replication feature. The feature allows you to deploy replicated repositories at remote locations to enable geographically distributed teams to work with Subversion repositories at LAN speeds. Read the article KB136: Getting started with Multisite Repository Replication for setup instructions.
Enable Remote Server Administration
VisualSVN Server Enterprise license comes with the Remote Server Administration feature. VisualSVN Server Manager console is implemented as a standard Microsoft Management Console (MMC) snap-in and allows you to manage multiple Subversion servers remotely from a single console. Read the article KB25: Getting started with Remote Server Administration for setup instructions.